|
Capt. Ray's Angel Hair Flies | |||
|
| |||
| |||
|
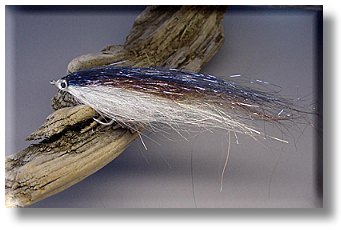
These flies have attitude, and a bad one at
that. These hooked morsels are always sticking their noses into some
fish's business, teasing and touting them to strike back. They puff up
like a bully and then run away. What gives them this attitude? It's a
material developed by Angler's Choice called "Angel Hair."
It's no secret that synthetic materials have changed our fly designs over the years. Most of the flies today use an array of synthetic materials that allow us to achieve effects only dreamed about in the old days. Angel Hair is one such material. Two properties that make it inherently productive are its ability to flow naturally and its translucency. The combination of motion and color creates subtle hue changes that add to the realism. These flies simply look more like a fish's natural forage. My first successful saltwater patterns were developed almost four and one half years ago. At the time, West Coast tiers were using Angel Hair to accent their fresh water creations. Users found A.H. to be extremely radiant and attractive material. They also found out that the material lacked durability and was extremely difficult to work with. Tiers started to hybrid angel hair with other materials to increase its durability. This method of tying changed the dynamic flow of the material. But up until this point people were experimenting with smaller flies. Had anyone ever attempted to tie a larger profile saltwater pattern? In doing so, I knew I had to overcome the same obstacles that they faced, along with a fouling problem with longer hair. My question, "How can I solve this, and still retain the magic motion of the material?" This was my biggest concern? Ultra Hair provided a solution to the fouling problem. It gave me a firm foundation, not only to support the top half, but to separate it from the bottom half as well. Ultra Hair acted as a barrier in this case between two halves. It did nothing to limit the motion of the material, so that worked. I also attempted to harness the material with chemical additives but soon found that the loss of motion was detrimental. Back to the drawing board. Soon I began to place the material in concentrated areas using each and every fiber to support itself. This firmed up all the material along the hook shank, without loosing its undulating properties. Mixing short hair with longer hair in the folding process has helped to add strength to the fly. Handling angel hair will take patience and practice. You will soon develop your own techniques on best how to apply it. My best advice is to stick to it and don't get discouraged. Be resourceful. If you master the material the benefits of catching fish, outweigh the tying problems. Tie up a few. You will soon see that your tying techniques with improve over time. In the last two years there have been many variants of Angel Hair flies. Anglers are starting to notice its fish catching abilities. Here in the Northeast, my patterns have taken countless numbers of Bass, False Albacore, Bonito and Bluefish. The secret is out. There’s nothing like having a few angels with you on the water to keep you company.
| |||
| |||
| Capt. Ray Stachelek operates Cast
a Fly Charters in Southeastern New England. He enjoys designing flies,
teaching the art of fly tying, and sharing his 40 years experience through
seminars and slide shows.
| |||
| |||
| |||
| |||
|
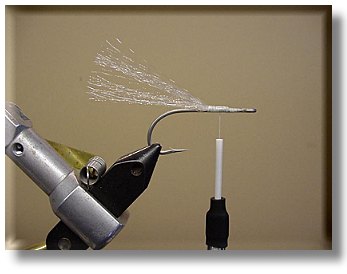
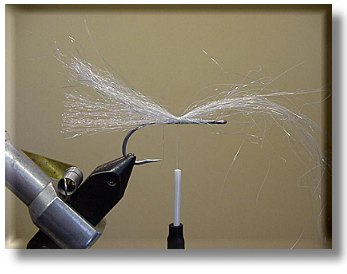
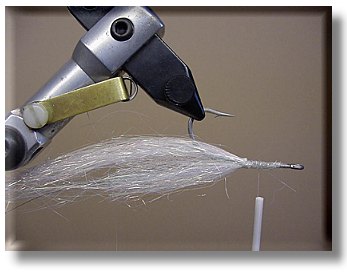
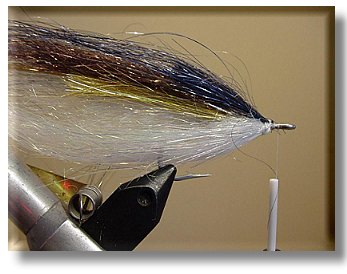
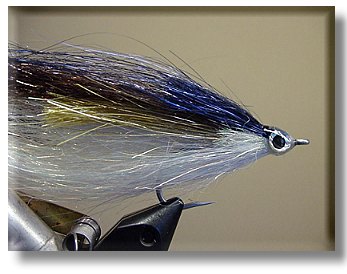
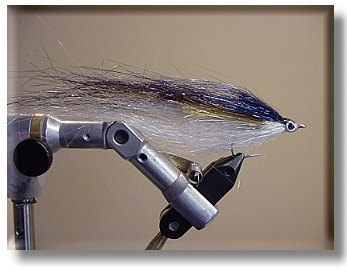
Never pull on the material when separating it. Use a bodkin to isolate the section from the rest before clipping. Use your other hand to apply pressure near the nylon tie to keep it from pulling off the scene. Material is very slippery. A fold back method is the preferred way of applying all Angel Hair. All measures of angel hair will be the size of a 6D nail. Make sure there is adequate length do to the fact that the fold back method is exclusively used. | |||
| |||
| |||
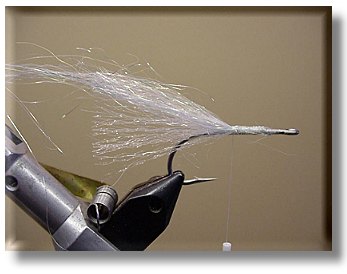
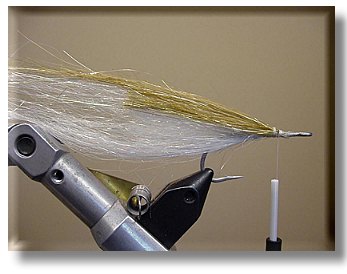
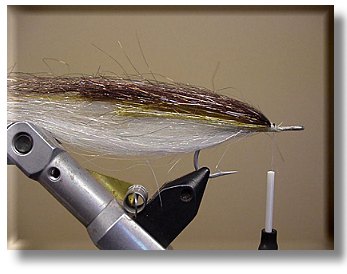
Helpful Hint: All material will be applied in this tying sequence exactly like Steps 2 & 3.
| |||
| |||
| |||
| |||
| |||
| |||
| |||
| |||
|
| |||
|
Copyright ©2000,
2001 Flyfishsaltwaters.com
|